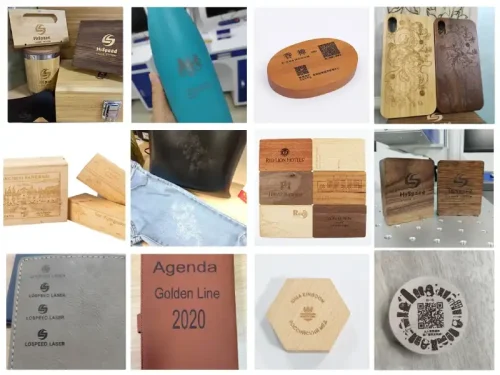
A cutting board is a commonly used tool in a kitchen. You are also familiar with this tool, which helps you cut and prepare food. Most cutting boards come with a plain design. Still, many enthusiasts prefer a uniquely engraved cutting board.
Engraving is one way to make a cutting board attractive and personal. You might want to engrave names, recipes, quotes, images, and patterns on the surface. To do this, you might think of using hand tools, power tools, wood-burning pens, or laser engraving methods. Among them, laser engraving is the most efficient and precise marking method. It creates clean and detailed designs with high accuracy. As a result, it is now becoming more popular.
How to Engrave a Cutting Board?
You can engrave cutting boards in various ways. Some common methods are hand tools, carving tools, wood-burning pens, and laser engraving. Some are cheaper, while others can offer better contrast and design results. Today, people are moving toward modern engraving methods. In this case, laser engraving offers better solutions.
Power Tool Engraving
A power tool engraving machine uses high-speed rotary tools to carve on materials. This tool is similar to a Dremel. This system contains a sharp metal bit that spins at thousands of revolutions per minute. Operators guide it through hand during surface processing. Often, people use digital files for precise engraved cutting boards.
This tool removes material from the surface top, layer by layer. Using high pressure on this system allows it to create deep lines. Here, you may control the speed accordingly. Beginners can start slow and improve. It’s typically suitable for home use. You can engrave names, simple patterns, and basic logos easily.
Wood Burning Pen
A wood-burning pen is a pyrography machine. It has a heated metal tip that connects to an electrical power source to heat it. You need to hold the pen in your hand and move it around the wood surface to engrave. Thus, the intense heat can burn through the surface, leaving a curving dark mark.
This manual technique gives you artistic freedom. It can create a rustic look. Besides, every line you draw gives a natural look and a hand-drawn feel. Here, you can also control dark values by changing speed and tip pressure. Wood burning pens are an ideal option for DIY home projects and personalized gift items.
Laser Engraving Machine
Among all other options, laser engraving machines are the most popular choice. They use a focused light beam that burns through the surface for etching. The entire process is computer-controlled. There is no chance of human error, which can lead to costly charges. You upload your designs and set parameters. The machine completes the rest of the task.
A laser engraver is also renowned for its precision, accuracy, and high speed. It can easily handle complex designs and never misses a single detail while etching. Such efficiencies make it a reliable option for commercial woodworkers. With it, you can engrave wedding gifts, kitchenware, artwork, and many more. Overall, it’s a versatile option.
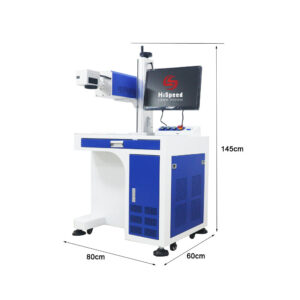
How to Engrave a Cutting Board with a Laser Engraver
When engraving a cutting board with a laser, you must do it systematically. Here, each step affects the final result. In this case, a systematic approach helps create clean and accurate designs. Besides, it also reduces mistakes and material waste. If you fail to follow the steps, the engraving may look uneven, too deep, or unclear. Sometimes, you may end up damaging the cutting board.
Step #1: Select Board Types
For laser-engraved cutting boards, always choose hardwood like maple, walnut, cherry, and others. Avoid selecting soft woods like pine. Dense wood works better with laser engraving. They burn evenly and provide high-contrast results.
Step #2: Prepare Surface
Before proceeding with the laser engraving, clean up the wood surface. You can sand the surface to make it smoother and glossier. Then wipe off all dust particles with a microfiber cloth. Apply painter’s tape to the targeted surface area. It prevents smoke and burn halos.
Step #3: Create Your Design
You may create your own graphic design using LightBurn or LaserGRBL. Alternatively, you may download a design from an online website and customize it later according to your needs. Make sure to match your design dimensions to the board size.
Step #4: Focus Laser
Place the wooden board on the honeycomb bed for engraving. Now, use a height gauge or focal tool to adjust your laser head. Using a precise focal distance ensures flawless details during engraving. It gives consistent burn and engraving depth.
Step #5: Set Parameters
Parameters are one of the most crucial elements in custom engraved cutting boards. Adjust the power level, speed, and pass settings according to the design requirements. Lower power levels are suitable for light marking, while higher power suits deep engraving. Correct settings ensure clean, sharp, and detailed results.
Step #6: Design Alignment
Use hold-down clamps to secure your wood board on the workbed. Place your design on the board surface and use the machine alignment tool. Position the design as needed. This practice prevents material waste and saves on the budget for the engraved cutting board.
Step #7: Run a Test Cut
The next step is to verify your settings to ensure the parameters meet your goals. Test the settings on scrap material and inspect the outcome. Check the design depth, clarity, and other factors. Adjust the settings if needed, and never skip the testing step.
Step #8: Start Engraving
If everything is perfect, then start the engraving process. Wear all the safety gear, such as goggles and other necessary equipment. Turn on the exhaust fan or air assist system to clear the smoke out of the room. Press the start button and observe the engraving process closely. If you notice any anomalies, turn off the machine instantly.
Step #9: Clean Residue
At this stage, peel off the masking tape carefully. Use a nylon brush or soft cloths to remove loose soot from deep grooves. You can also use isopropyl alcohol to remove burn marks from the surface.
Step #10: Post-processing
Use a liberal application of food-grade mineral oil on the wood. Let the oil soak into the grain for a few hours. Wipe excess oil with a clean cloth to seal and protect the finished board. It protects your engraved cutting board wood for later use.
Are Laser-Engraved Cutting Boards Food Safe?
Laser-engraved cutting boards are food-safe after engraving. A laser engraver only changes the surface texture through burning. It does not use chemicals that remain after engraving to degrade food safety. The wood stays natural and clean. But the safety heavily depends on the wood type as well. Some are food-safe, and others may not. So, always choose food-grade wood.
Apart from this, finishing also matters a lot for food safety. Finish your engraved cutting board with food-grade oil or beeswax. In this case, avoid using harmful paint, chemical stains, and other substances. Always clean the board after each use and let it dry properly.
Cutting Board Engraving Ideas and Designs
Laser engraving is a versatile method. Unlike traditional hand tools, laser engraving can create anything you desire. All you need is a design file, add it to the system, and apply it to your cutting board. The following are some of the most common designs engraved on cutting boards.
1. Monogrammed Cutting Board
Generally, a monogrammed design features bold family initials and last names. It adds a personal touch. The initial look is elegant and simple. These features make it a perfect choice for wedding gifts, anniversaries, and housewarmings.
2. Recipe Engraved Cutting Board
Recipe engraving is one of the finest cutting board engraving ideas. Many people engrave recipe ideas on a wooden surface. Modern lasers trace exact script styles from old photos. Such nostalgic ideas preserve family memories and secret kitchen traditions generation after generation.
3. Quotes and Sayings
Funny and inspirational quotes work well on engraved cutting boards. Kitchen-themed quotes are quite popular here. You may also produce simple, short family mottos on engraved cutting boards. These designs work well on decorative items and gifts.
4. Image Engraved Cutting Board
A laser engraver allows detailed drawings and high-contrast image engraving. This system only vaporizes the surface to create high-accuracy artwork. These photo boards serve as personalized display keepsakes.
5. Events, Locations and Memories
You can even mark special occasions with dates, locations, and messages. Engraving anniversary dates or stating emotional sentiments is also special. Engraving such dates or coordinates celebrates milestones.
6. Flowers, fruits or Nature
For decorative items, many people and small business owners engrave floral patterns, leafy vines, and other natural illustrations. These artistic designs enhance room and kitchen aesthetics significantly.
Conseils d'experts
Choosing the right laser engraving machine for an engraved cutting board is the most vital decision. Diode lasers are ideal for low-volume and DIY home crafts. However, if you run a commercial shop and need to handle high-volume production, a CO2 laser is the top-tier option. It offers high beam power, speed control, and precise results. Also, make sure the machine fits in your workspace.
Check software compatibility. Easy software makes your design process simple. Look for good customer support. Contact us today to get expert machinery advice. Our technical experts are always ready to assist you. Reach out now to experience something innovative.