
You must have noticed that laser engraving on Yeti cups has become very popular in recent years. Why? Because these cups are strong, stylish, and long-lasting, laser engraving on them is easier. But the question arises: What is yeti laser engraving, and how to laser engrave a Yeti cup?
Basically, people really love personalized tumblers with names, logos, quotes, or custom designs. If you are new to laser engraving, this process may sound technical or complex. However, the good news is that laser engraving Yeti cups is straightforward if you understand the basics. That’s why, to help you out, I will explain everything about Yeti laser engraving in this guide. So let’s get started.
What Is Yeti Laser Engraving?

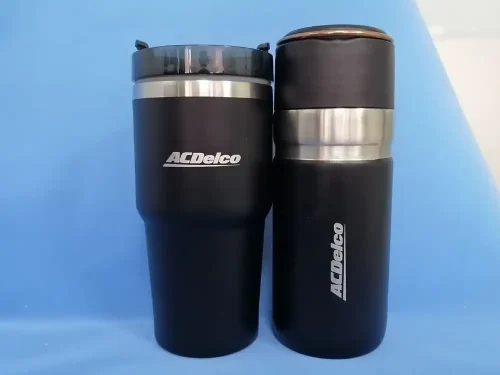
Yeti laser engraving is the process of creating designs, logos, or names on Yeti cups using a laser beam. In this process, the laser beam removes the upper layer of colored coating from Yeti cups. As a result, the underneath original surface of Yeti cups comes out with a specific design. This is a totally non-contact process.
Remember, in Yeti cup engraving, no ink is used; only a laser beam is used. Actually, the Yeti cups are primarily made of stainless steel. This metal is known for its durability, shine, and strength. However, it is sometimes coated with colored coatings to enhance its durability.
In Yeti cup engraving, this color coating is removed using a laser. The laser creates a specific design on the original stainless steel surface. You might think that the laser can damage the stainless steel. Right? But that’s not true. Laser engraving is a non-contact process. It only removes the top colored layer and does not damage the stainless steel.
Is Laser Engraving on Yeti Cups Permanent?
The answer is a big yes! The laser engraving on Yeti cups is highly permanent. As I said above, a laser does not add anything, such as ink, to the cup’s surface. It only removes the colored coating, leaving the design on the original stainless steel. The laser physically changes the cup’s surface. As a result, your engraved design becomes part of the cup. That’s why it doesn’t peel off or fade; it becomes permanent.
How to Laser Engrave a Yeti Cup: Step-by-Step Guide
Now, do you have a basic idea of Yeti cup laser engraving? If so, let’s move on and explain how a Yeti cup is actually engraved in real life.
Step 1: Preparation of Design & File Setup
First, you have to decide on the design you want for the Yeti cup. It can be anything you like, such as a name, logo, or a custom design like a flower. However, if you are a beginner, start with a basic design as it will give you clean results. So once you have decided on the design, open the laser engraving software on your computer.
Mainly for laser engraving, LightBurn or EZCAD software is used. This software lets you create your design accurately. Once you have decided on the design and added it to the software, you have to adjust the size of the design file. Why? If the design is too big or too small, it won’t fit your Yeti cup properly. So, place it in the correct position where you want it to appear on the cup.
Step 2: Machine & Rotary Attachment Setup
The next important step in yeti cup laser engraving is setting up the laser machine and adding a rotary. But what is a rotary? You must understand it. Actually, as you know, Yeti cups are round. Laser engraving machines themselves cannot rotate these cups to engrave a design. That’s why there are rotaries attached to the laser machine that rotate the cup accordingly.
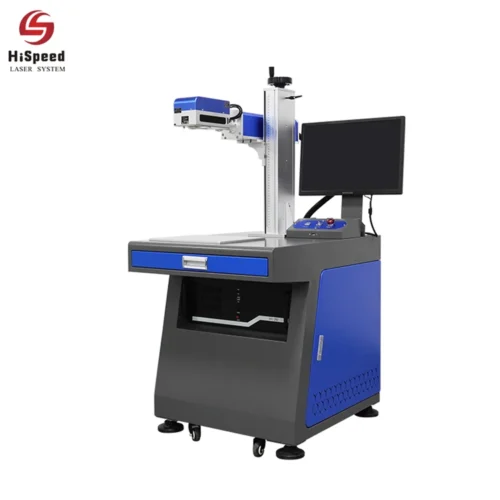
Carefully attach the rotary to the laser machine as instructed. After that, place the Yeti cup into the rotary and check that it holds the cup securely. Next, adjust the laser’s height and focus. Often, laser machines like 3D laser marking machines come with automatic focus or have a focus knob. You need to rotate this knob to keep the laser focused so it hits the exact spot on the Yeti cup.
Step 3: Laser Settings & Test Engraving
After you have secured your Yeti cup on the rotary, it’s time to set the laser. In laser settings, you have to set three parameters. First is the speed of the laser. This parameter determines how quickly the laser hits the surface of your Yeti cups. Secondly, you have to adjust the laser’s power, which means how intense it should be. The third and last parameter is the laser frequency.
It means how many times the laser should hit the same area to create the design. If you are a beginner, you must adjust all these parameters with expert instructions. After laser setting, don’t rush into the process. Instead, take an old Yeti cup, run it through the laser, and test the results.
4- Engraving the Yeti Cup
Now that testing is complete, it’s time to finally engrave your Yeti cup. Here, take a moment to check all the parameters and make sure your Yeti cup is tightly secured to the rotary. After that, turn on the laser engraving machine. When you turn on the machine, the rotary starts rotating the cup, and the laser starts engraving the design you created. During engraving, the laser beam first vaporizes the outer colored coating.
After that, it begins creating the given designs on the Yeti cup surface. However, at this point, you must stay with the machine but don’t touch anything; just keep watching. Make sure that the design is not faded or smoky. If you notice any misalignment, turn off the machine and adjust the laser parameters. If not, let the laser machine do its work. Once your desired design is obtained, turn off the laser machine, and your custom Yeti cup is ready.
Step 5: Final Cleaning & Quality Check
After you have obtained your custom-designed Yeti cup, the final step is cleaning and a quality check. How? During laser engraving, some residue or a smoke mark remains on the Yeti cup’s surface. These marks can affect the design’s quality. So take a clean cloth, and it’s better to dip it in alcohol and wipe away all the residue from the cup surface.
However, you should avoid abrasive cloths, as they can ruin your cup’s design. After cleaning, check that the design is straight, fully visible, and sharp. Make sure that there are no unwanted spots or mistakes. If you feel there’s a minor mistake, a quick laser touch-up can make the cup design perfect.
Safety Tips for Laser Engraving Yeti Cups
At first, Yeti cup laser engraving feels like fun. However, it’s also a high-risk process, and even slight mistakes can cause serious hazards. Before you start engraving your Yeti cup, let’s review these safety tips.
- Wear Laser Safety Glasses: A laser beam is highly powerful and can harm your eyes. Even if it is reflected into your eyes, it can cause serious injury. So before you start engraving your Yeti cup, always wear laser glasses and gloves.
- Proper Ventilation: As you know, the laser beam produces thick fumes. If you accidentally inhale these fumes, they can severely damage your lungs. You should make sure the space where you use the laser is fully ventilated so that fumes can escape.
- Avoid Contact with Hot Cups: After engraving, the cup is often very hot from the laser. If you try to touch it directly without gloves, it will burn your hand. So always let the cup cool down, or use gloves when picking it up.
- Follow Manufacturer Guidelines: Each laser machine has its own instructions for safe use. If you try to proceed with laser engraving without proper instruction, the result will be harmful. Always read the user manual and follow the manufacturer’s instructions.
Perguntas frequentes
How long does it take to engrave a Yeti cup?
In general, the time to engrave a Yeti cup depends on the design size and the laser settings. On average, simple logos usually take 1–3 minutes. However, large or full-wrap designs can take 10–20 minutes.
Can you engrave fake or generic tumblers, like Yeti ones?
Yes, you can engrave fake or generic tumblers that look like Yeti tumblers. The process is the same as engraving an original Yeti cup. However, by engraving on a fake tumbler, you can practice more effectively, reducing the risk of mistakes on the original Yeti cup.
Does engraving damage the Yeti cup’s insulation?
No, laser engraving does not damage the insulation of a Yeti cup. As I said above, laser engraving is a non-contact process. So it only removes the outer coating and does not affect the stainless steel.
Conclusão
Engraving on the Yeti cups is the most exciting way to personalize your cup. However, because of these technical terms, it can sound confusing to many people. That’s why, in this article, I have discussed everything in detail about the Yeti laser engraving. Basically, this process uses a laser beam to remove the outer colored layer of the Yeti cup and create the desired design.
As the design is engraved on the original cup surface, it is permanent and worth it. By following the steps I discussed above, you can even engrave the Yeti cup yourself. However, safety is most crucial during the entire process. A slight mistake can cause serious mishaps. So be careful, follow the manufacturer’s instructions, and go ahead and engrave your Yeti cup.