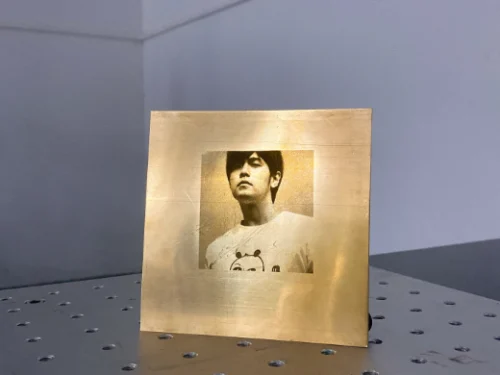
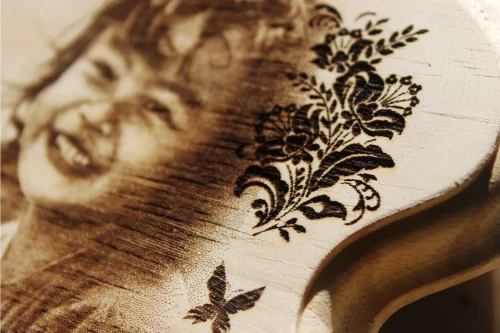
Photo laser engraving is a process of etching images or patterns on an object. However, the process is done by using a laser beam. The final results mainly depend on how you have prepared your images. For optimal results, each material requires a distinct set of settings and preparation. That’s why you need to learn multiple techniques for laser engraving photos. In this article, we have covered different tricks for photo laser engraving.

Tip #1 Image Source Matters: Selecting the Right Photo, Remove or Edit the Background
The quality of the image plays a crucial role in the final engraving. Therefore, high-resolution images will yield the best results. Here are some ideas for selecting an image:
- The pictures you use must have a resolution of at least 300 DPI.
- During engraving, blurry or low-contrast photos tend to lose detail. Therefore, it is essential to avoid using low-resolution photos.
- The photo laser engraving machine doesn’t print colors. Thus, you can convert the image to a greyscale for better laser interpretation.
- Adobe Photoshop, CorelDRAW, and LightBurn are recommended for image processing.
Tip #2: Test Engraving with Grayscale Matrix
The grayscale matrix test helps determine the ideal power and speed settings for different shades. This method ensures the best possible image reproduction. Here are the steps that you can follow for grayscale matrix testing:
- First, create a test design that utilizes all shades of gray, ranging from 0% to 100%.
- Secondly, engrave the test pattern on the target material.
- Then, analyze the results to discover the best power and speed settings.
- Finally, adjust the settings accordingly.
Tip #3: Selecting the Right Materials
Different materials have varying advantages and disadvantages for laser engraving. You have to select the appropriate material. It will enhance the quality of the final output. Some materials and their descriptions are mentioned below:
- Wood: Pale or light-colored wood with minimal grain patterns is best suited. Additional resin content increases engraving contrast. The best woods are alder, cherry, and maple. Also, more affordable options are basswood, pine, and Baltic birch.
- Acrylic & Plastic: It produces a clean and frosted image with minimal burning.
- Glass & Crystal: The glass material creates a frosted effect. When using this material, it is recommended to use a damp paper towel to prevent chipping. A resolution of 333 DPI is recommended for glass engraving.
- Metal (Anodized Aluminum, Coated Metals): Metal will provide sharp engraving.
- Leather: It produces deep, warm engravings. This material is more prone to creating harmful gases. Thus, it requires good ventilation.
Each material requires different settings and preparation. It is essential to test before the final engraving.

Tip #4: Photo Laser Engraving with Different Raster Algorithms
Raster engraving algorithms affect how the laser interprets and engraves an image. Choosing the correct raster mode gives accurate and detailed results. Some raster algorithms we have described below:
- Dithering – Creates a dot pattern in an image, perfect for high-contrast photos.
- Stucki, Floyd-Steinberg, Jarvis – Best for grayscale pictures with a lot of detail.
- Threshold Mode – Best for simple black and white engravings.
- Halftone – Forms shading effects with small dots of different sizes.
Each algorithm is suited for different materials and engraving styles. It is better to test different modes, which will help you determine the best choice for a given image.
Tip #5: Choosing the Right Lens for Photo Laser Engraving
The lens in a laser engraving machine plays a vital role in determining the focus of the engraving. It helps to create precision and detail in the engraving. The following lenses are widely used in a photo laser engraving machine:
- 5-inch lens(38.1mm): This lens is best for fine details and high-resolution engravings.
- 0-inch lens (50.8mm): This lens is well-balanced and gets the job done quickly with good clarity.
- 5-inch lens(63.5mm): For thicker material and deeper etching, 2.5-inch lenses are suitable.
- 0-inch lens(101.6mm): It is used for engraving curved surfaces and deep engravings.
The right lens will provide sharp quality and enhanced results for engraved photos.
Tip #6: Slow and Low
To get the best engraving results, it’s necessary to adjust the laser’s power and speed. Here are the best measures:
- You should use low speed and low power for high detail.
- You should increase the speed gradually to avoid over-burning. If the speed is too slow, extra heat can burn the materials. On the other hand, it’s possible to lose tiny details if the speed is too fast.
- It’s a good idea to try out different speed-power ratios. So that you can use it to find the best choices for your items.
Engraving more slowly offers greater control of depth and shading. It is also suitable for producing a more refined image.
Tip #7: Air Assist On
Airflow in a laser engraving machine helps to blow out the smoke and release excess heat. Using an Air Assist system improves the engraving quality by reducing burn marks. Air Assist’s advantages are:
- It prevents overheating and burning.
- It assures the lens is clean for enhanced focus and accuracy.
- It improves engraving contrast, especially on wood and acrylic.
If the air assistance on your machine can be changed, try different pressure settings to get the best results.
Tip #8: Gamma Correction
Gamma correction lets you change how bright or dark a picture is. Furthermore, the process enables the correct preservation of details. The following steps you can follow to use Gamma Correction:
- First, you have to open the image in editing software.
- Then, you have to adjust the gamma value to increase or decrease brightness. Here, you need to make sure that the highlights and shadows are equal.
- Finally, you have to engrave a small section to verify the results.
Adjusting the gamma level gives an engraved photo greater depth and clarity. Also, it makes the photo look more genuine.
Final Thoughts
Photo laser engraving needs image preparation, material selection, and laser settings. Patience, practice, and focus are needed. So, you should follow the above techniques to improve engraving quality. Moreover, you should never stop exploring and learning new things. It’s the best way to become a master in photo laser engraving.
If you have any questions about the machine or the material, please don’t hesitate to ask. Feel free to contact us anytime.
